In your day-to-day business activities, you may need to create different groups of users. For example, the sales department can be divided into the sales and marketing departments. Furthermore, you may want to assigns certain users to certain groups.
Before we describe the steps you need to follow in order to add a group in Flexie CRM, let’s briefly explain the importance of creating groups. To increase efficiency within an organization, you need to delegate certain tasks to a certain group of users. This is done not only because of the vital need of delegating tasks, but also because each user within a certain group may have the right expertise to solve a specific problem that may arise during the day. Depending on the nature of your company, you may need to create several groups, and each group can contain one or more users.
In Flexie CRM, you can create as many groups as you want. Your business needs may change constantly, that’s why you need to be always alert and flexible. The more your company grows, the more you need to delegate certain tasks and responsibilities. That’s where groups come into play. Each group you create will be responsible for processing and carrying out certain tasks. This is perhaps one of the best ways of saving time and increasing overall efficiency.
In addition to the benefits described above, groups can help you organize things better. For example, you can assign different objects across different user groups. The assigning process, in turn, helps you distribute records(leads, contacts, deals, etc) equally to each user within a specific group. This is done through the round-robin mode. Each user user will be assigned leads, contacts or other records through this mode. This would greatly increase efficiency within your company.
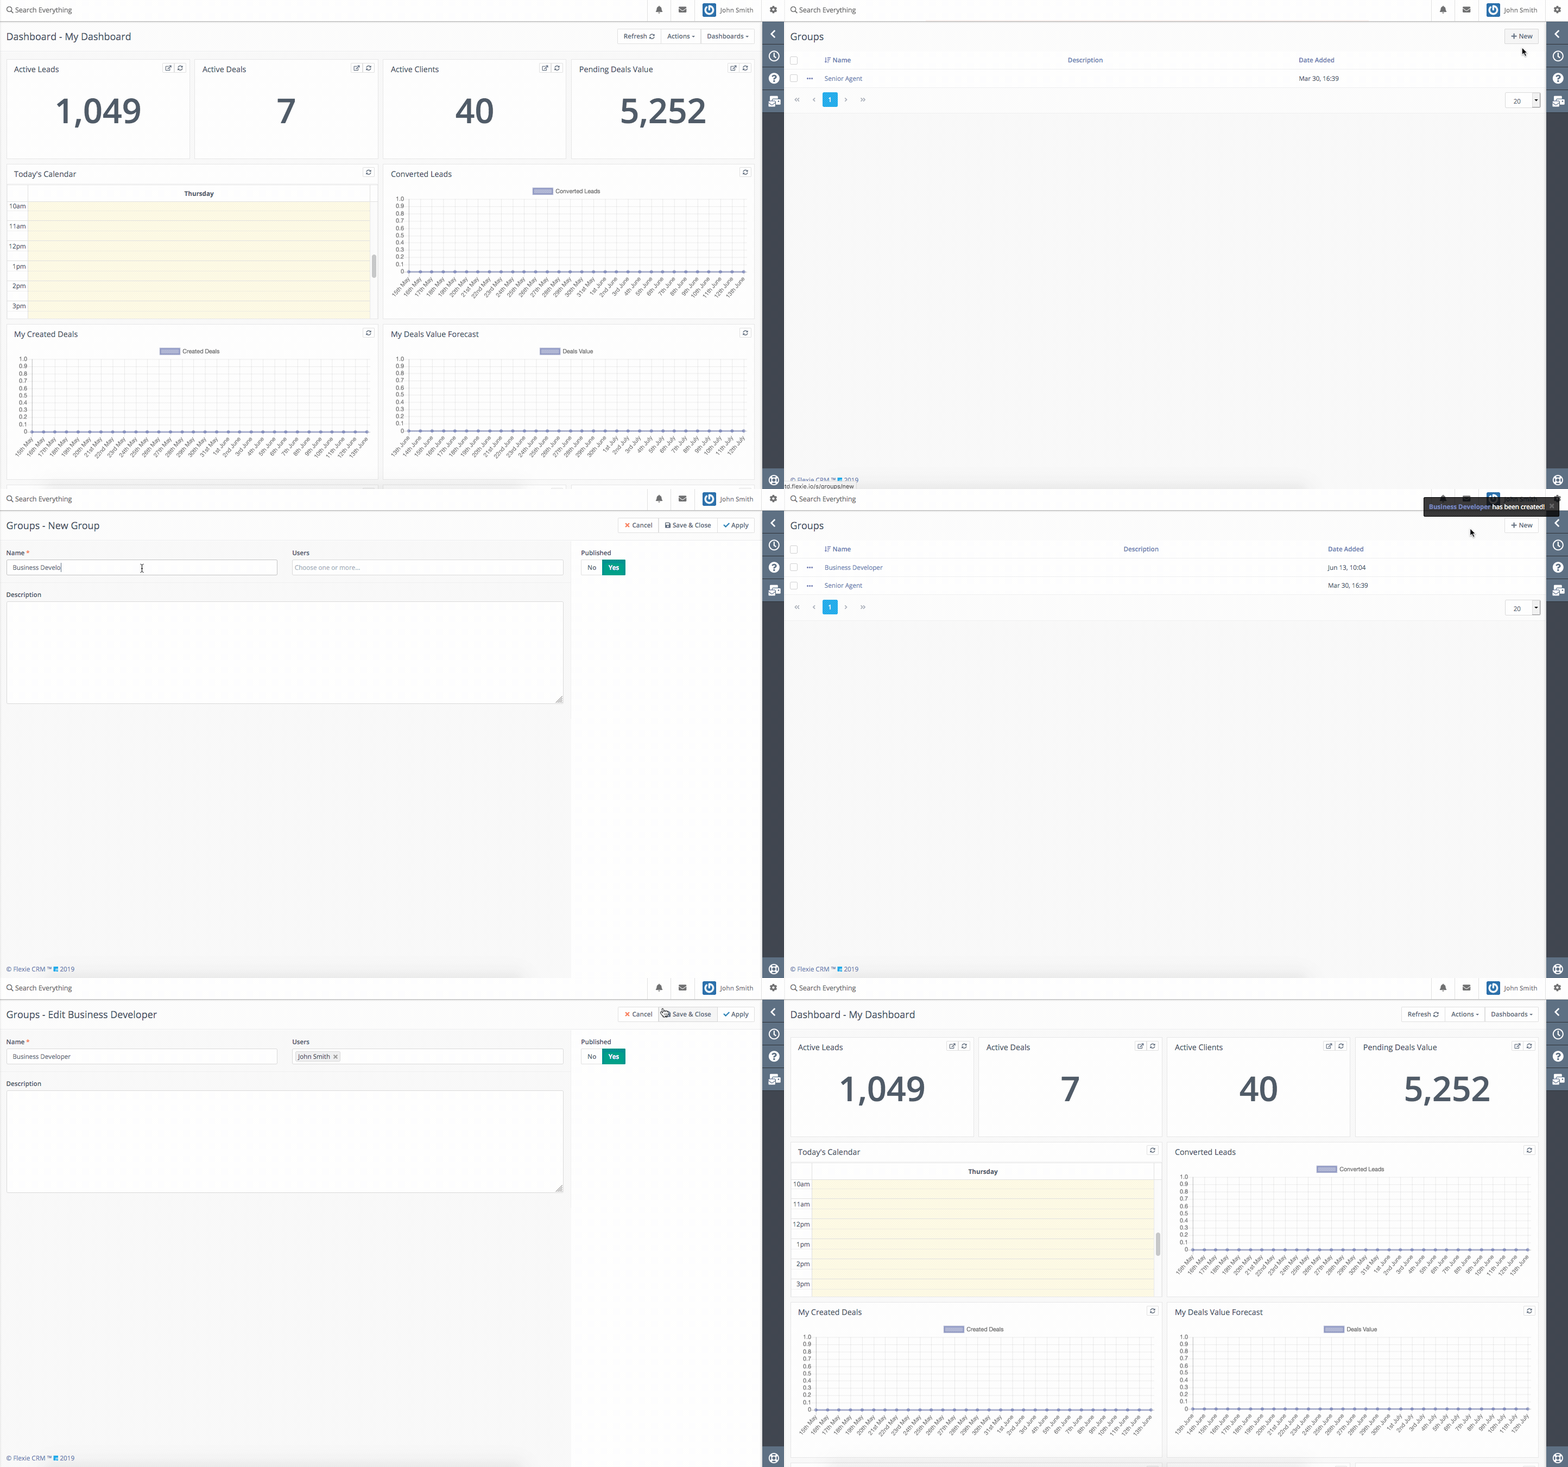
In order to add a group in Flexie CRM, perform the following actions:
First, go to Setting at the upper-right corner of the page and on the drop-down menu click Groups.
Navigate to the top right corner of the screen and click New.

Write the name for the new group you want to create, fill in the users you want to be part of the group(you can add as many users as you want), write a description and then click Save & Close or Apply.
The name of the group is required for a simple reason: whenever you search for the group, you can easily identify it by its name. Save precious time that you can use for other important tasks.
Notice that in the description you can choose the writing style(bold or italic), use numbered and bulleted lists, etc. You have just created a new group. As you can see, creating groups in Flexie CRM is very simple. You can always edit groups whenever you consider it necessary.
To stay updated with the latest features, news and how-to articles and videos, please join our group on Facebook, Flexie CRM Academy and subscribe to our YouTube channel Flexie CRM.

