Let’s say you’ve signed up for your Flexie trial, and you want to add users so that they can use the CRM for themselves. But before we describe the steps you need to follow in order to add a user, let’s explain what a user is and its importance in the CRM context.
A user is someone who may have a certain level of access to the CRM. You decide the access level each user will have to the CRM. Within a company, employees have different roles. There are sales reps, support technicians, managers, etc. By creating a user for each role, you not only delegate certain tasks, but you also decide how much access they will have to the CRM. Now, let’s get back to explaining how you can add a user in Flexie CRM. Below are all the steps you need to follow in order to add users. Note that only admins can perform the following steps.
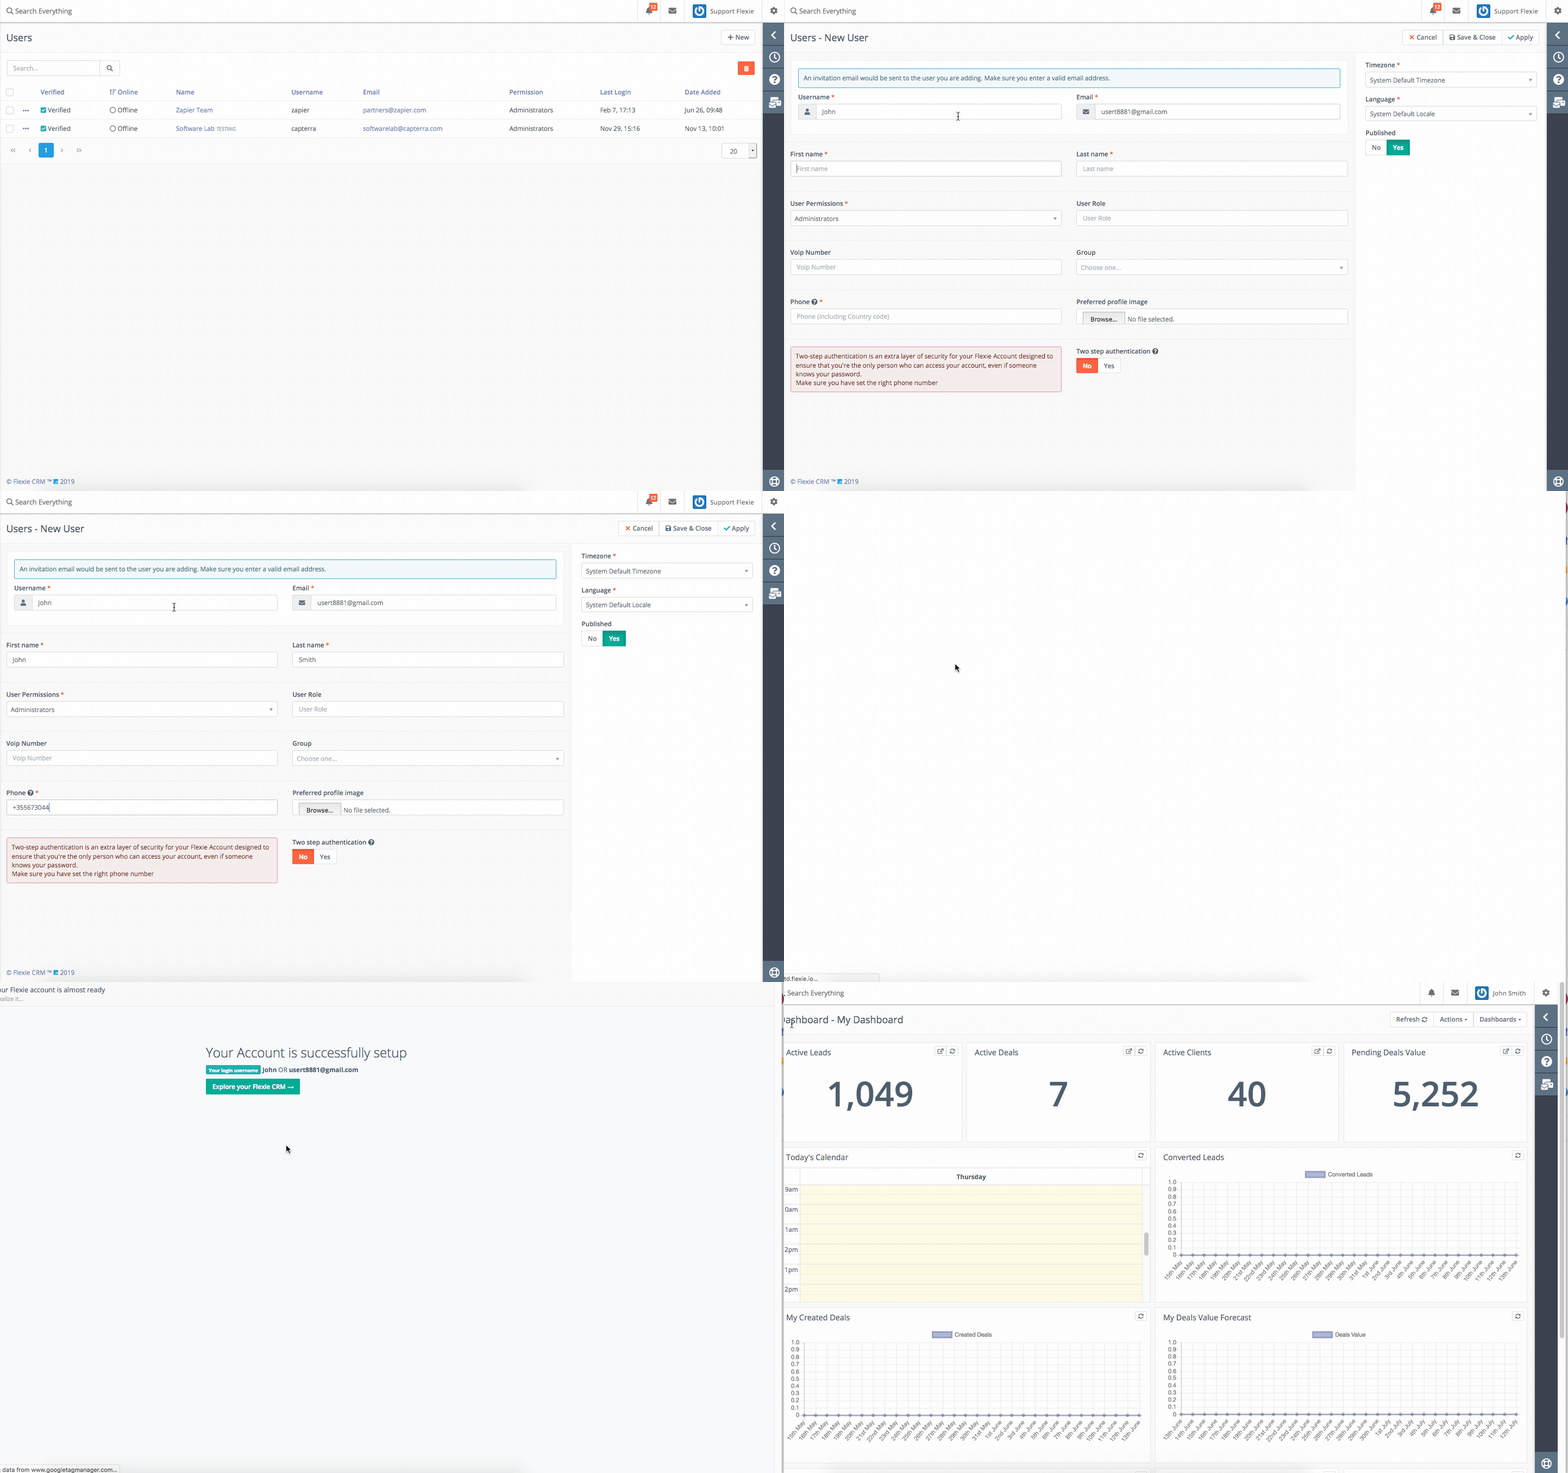
In order to add users to Flexie, first navigate to Settings at the upper-right corner of the screen and on the drop-down menu click Users.
Once you click the User button, you can proceed to adding users. To perform this action, go to the upper-right corner of the screen and click New.

First, enter the first and last name(optional). Next, set the user’s permission level. Do you want to give the user full access(administrator), or do you want the user to have limited access to Flexie CRM(agent)?
Note that the choosing the user permission is required.
Next, choose the user’s role, the group it will belong to, the phone number(obligatory), the username, the email and the password. Note that the phone number is required to enable two-step authentication, so make sure you set the correct phone number.
The two-step authentication is an extra layer of security for your Flexie account. Thanks to the two-step authentication, you will be the only person who can access your account, even in the case when someone else knows your password. That’s why you have to double check the phone number before you proceed to filling in the other fields.Notice that the username, the password and the email address are obligatory.
Double check all the values and ensure that every information you enter is correct. Once you fill in the fields, go and click Save & Close or Apply at the upper-right corner of the screen.
That is how you can add users in Flexie CRM.
To stay updated with the latest features, news and how-to articles and videos, please join our group on Facebook, Flexie CRM Academy and subscribe to our YouTube channel Flexie CRM.

